Use satisfaction surveys
Destiny Help Desk users with the Manage Site Settings administrative permission can create, manage, and view responses to satisfaction surveys.
This page has features to customize your view.
To create a satisfaction survey:
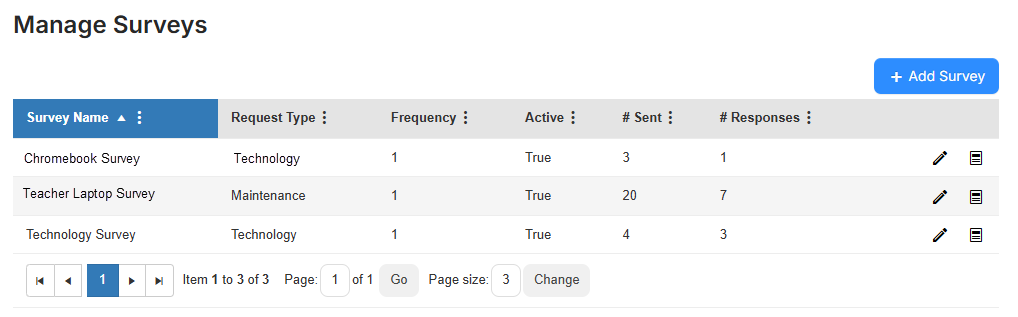
- Select Requests > Manage Surveys. The Manage Surveys page appears.
- Click +Add Survey. The Manage Survey details page appears.
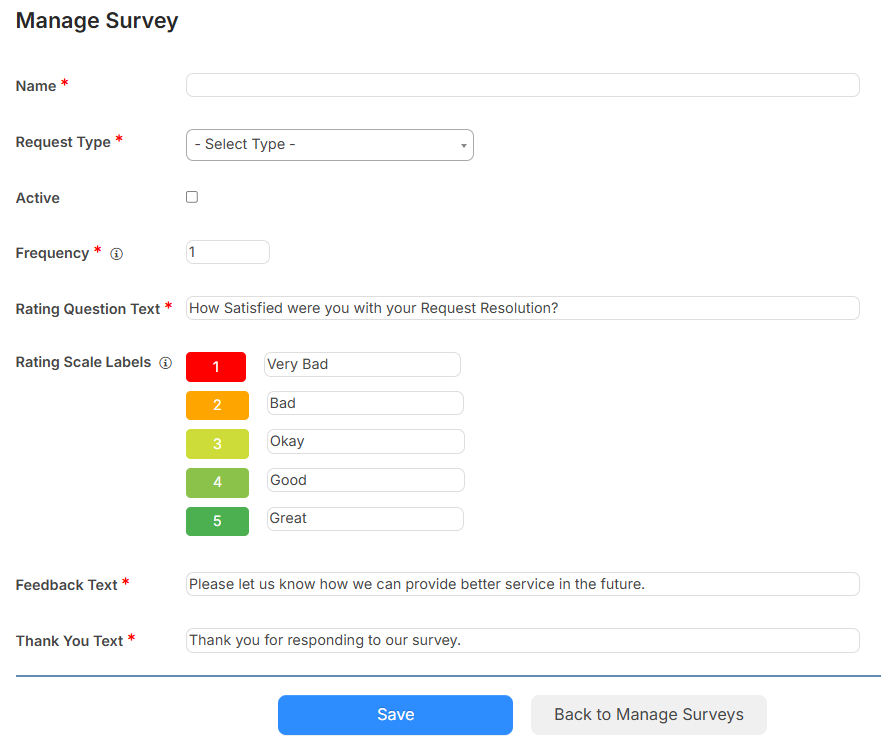
- Fill in the following fields:
Note: Fields marked with a * are required. Field Description Name (Required) Enter a unique name. Request Type (Required) Use the drop-down to select the request type.
Note: A survey can only be associated with one request type. Active Select the checkbox to include the survey in email notifications for completed requests.
Note: To receive a survey with a completed request email notification, users must have the Notify of Closed Requests and Notify of Completed Requests user permissions for requests they created. Frequency (Required) Select the number of requests completed or closed before a survey is sent.
Notes:
- Enter 1 to send a survey for every request.
- Range must be between 1 - 999.
The survey will not be sent to a requestor who was also the assignee of a request.
Rating Question Test (Required) Enter the desired text for the survey question. Rating Scale Labels If desired, enter a label for each number on the scale. Feedback Text (Required) Enter the text to show above a text box that requestors type feedback into. Thank You Text (Required) Enter the desired text to display after the requestor submits the survey.
- Click Save.
To review or edit a satisfaction survey:
- Select Requests > Manage Surveys. The Manage Surveys page appears.
-
In the row of the desired survey, do any of the following:
To... Then... See how many surveys were sent View the # Sent column. See how many responses were submitted View the # Responses column. Edit the survey - Click
 .
. - Make any desired changes.
- Click Save.
View survey responses Click
 . The survey results page appears.
Notes:
- The average rating appears top-left.
- You can access requests from the Request ID.
- Request information includes Building, Space, Assignee, Purpose, and Problem Type.
- Survey information includes Rating and Feedback.
Delete a survey Click  .
. - Click