Manage projects
Destiny Help Desk users with the Associate Requests with Project and Manage Projects permissions can group multiple requests together into a project. After creating a project, you can add new requests or existing requests to it.
| Example: A project may consist of one request for a broken screen, a second request for a missing letter on a keyboard, and a third request to replace a charging cord. Help Desk lets you run reports on specific projects, including all associated requests. |
The page also has features to customize your view.
To add a new project:
- Select Setting > Setup Items > Manage Projects.
- Select + Add Project. The Manage Project page appears.
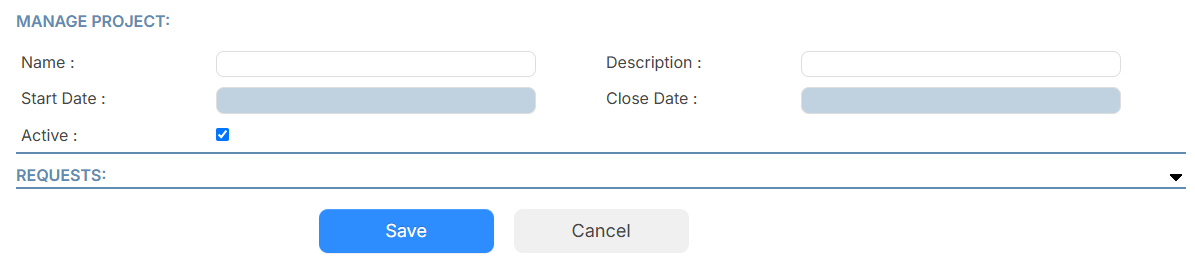
- Enter the following:
- Project Name
- Description
- Start Date
- Close Date
- By default, the project is active. To make it inactive, deselect the Active checkbox.
- Click Save.
To add an existing request to an existing project:
- Select Requests > View All Requests.
- Click the Request ID of the request you want.
- Click Edit. The request form appears.
- Next to Project, select the project you want to add the request to.
- Click Save.
To view requests within a project:
- Select Setting > Setup Items > Manage Projects.
- Next to the project you want, click
 .
. - Next to Requests, click
 . The requests associated with the project appear.
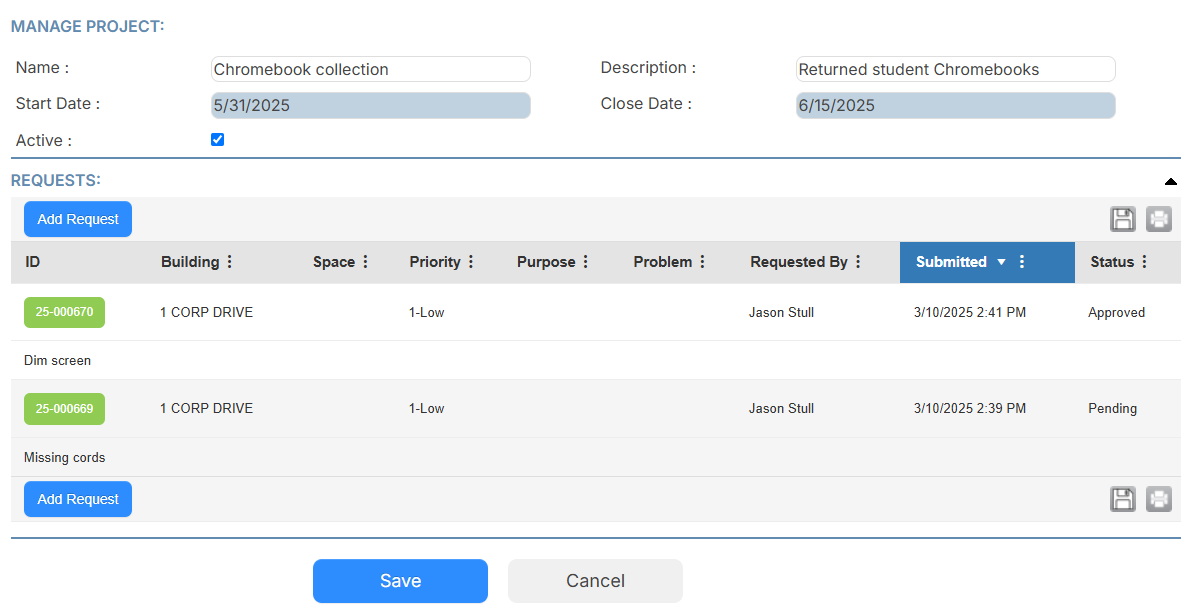
You can add a new request to the project by clicking Add Request and filling out the form.
To view a project from a request:
- Select Requests > View All Requests.
- Click the Request ID of the request you want.
- In the General Information section, under Project, click the project hyperlink.
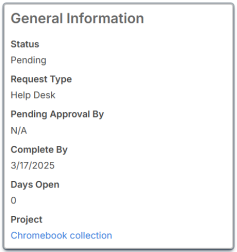
The Manage Project page appears.