Import assets
Help Desk users with the Can Import Assets permission can import assets via an Excel file using the Import Wizard.
|
Note: Any assets added directly to Help Desk will not be synced with Resource Manager. To sync, add items to Resource Manager first, then sync to Help Desk. |
To use the Import Wizard:
- Select Assets > Asset Import. The Import Wizard appears.
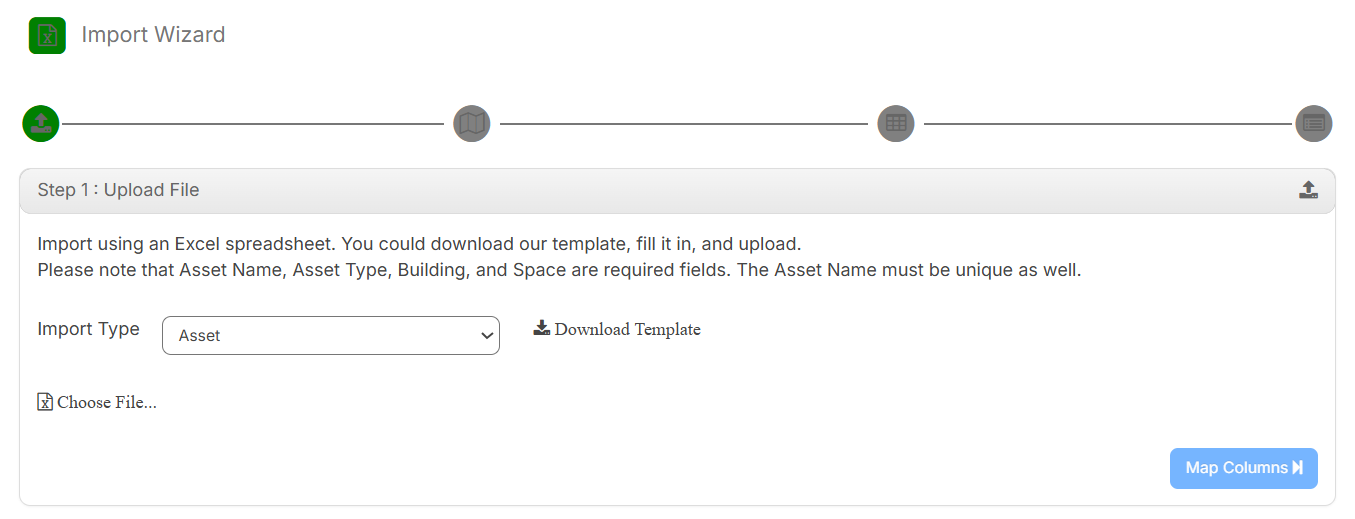
- To upload your Excel file:
- Click Choose File....
- Select your desired file.
- Click Open.
Notes:
- Asset, Asset Type, Building, and Space are required fields.
- You can use the Help Desk asset template if you do not have a file. Click Download Template, and it will appear in your Downloads folder.
- The Help Desk asset template also includes the following optional fields: barcode, make, vendor, model, serial number, purchase order, asset cost depreciated value, salvage value, purchase date, installation date, warranty expiration date, retired date, replacement date, useful life in years, status, assigned to, sub type, description, QR code, and three custom fields.
- Use the drop-downs to select the desired Help Desk fields you want to correspond to your spreadsheet fields.
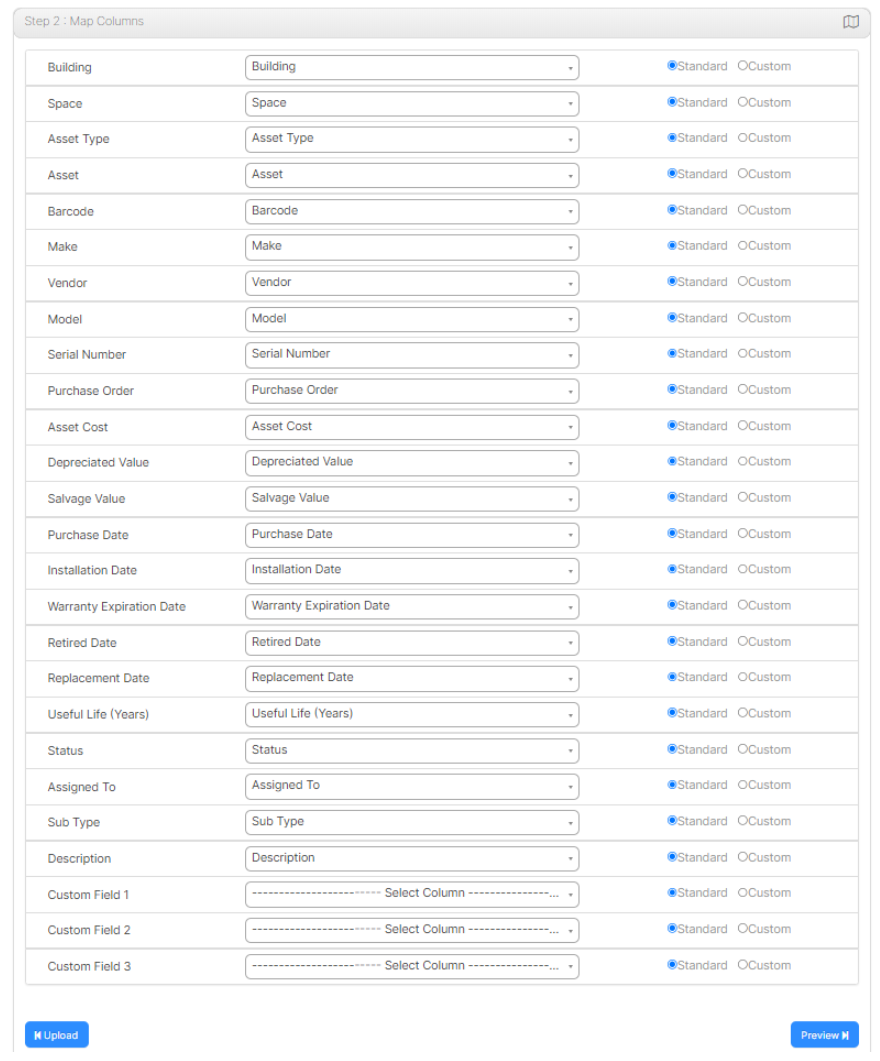
Notes:
- Column names from the Excel file appear on the left.
- If the column name is an exact match, it automatically lists the Help Desk field.
- If you map custom fields, select the Custom option.
- When importing custom fields, the Asset Type must have the custom field listed under Additional Information. Custom fields for asset types are managed under Assets > Manage Asset Types.
- Click Preview.The Preview page appears.
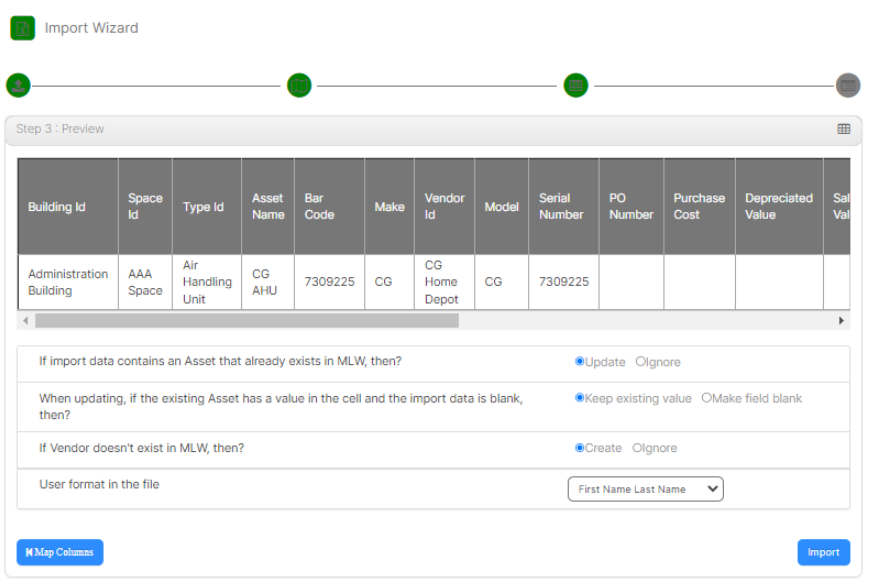
- Review the preview for accuracy.
- Select what you want Help Desk to do:
Situation Then... If import data contains an asset that already exists... Select either:
- Update
- Ignore
If the existing asset has a value, and the import data is blank... Select either:
- Keep existing value
- Make field blank
If the vendor doesn't exist... Select either:
- Create
- Ignore
If asset barcodes should be auto-generated... Defaults to No. Select Yes. Barcodes are not overwritten, and duplicates are not created. If you are uploading assets that are assigned to users... Select the format for Assigned To:
- First Name Last Name
- Last Name, First Name
- Email address
- Username
- Click Import.
A confirmation message appears.
- If there are no errors, your assets have been uploaded.
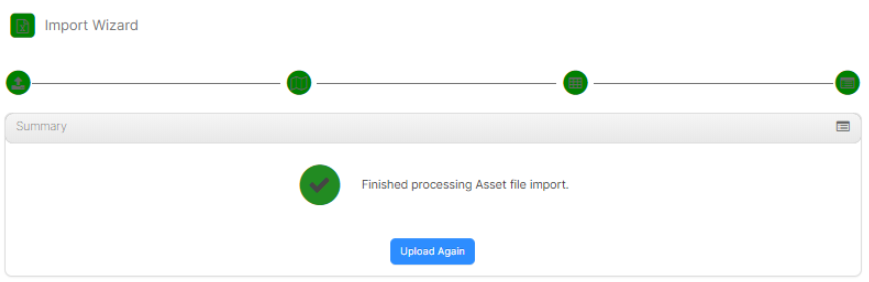
- If there are errors, do the following:
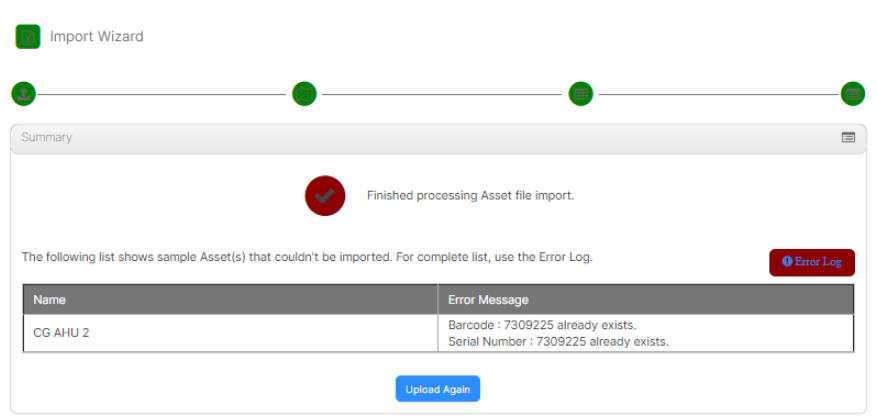
- To view a list of errors, click Error Log.
- Correct the errors in the Excel file.
- Run the Import Wizard again.