Run an SLA Report
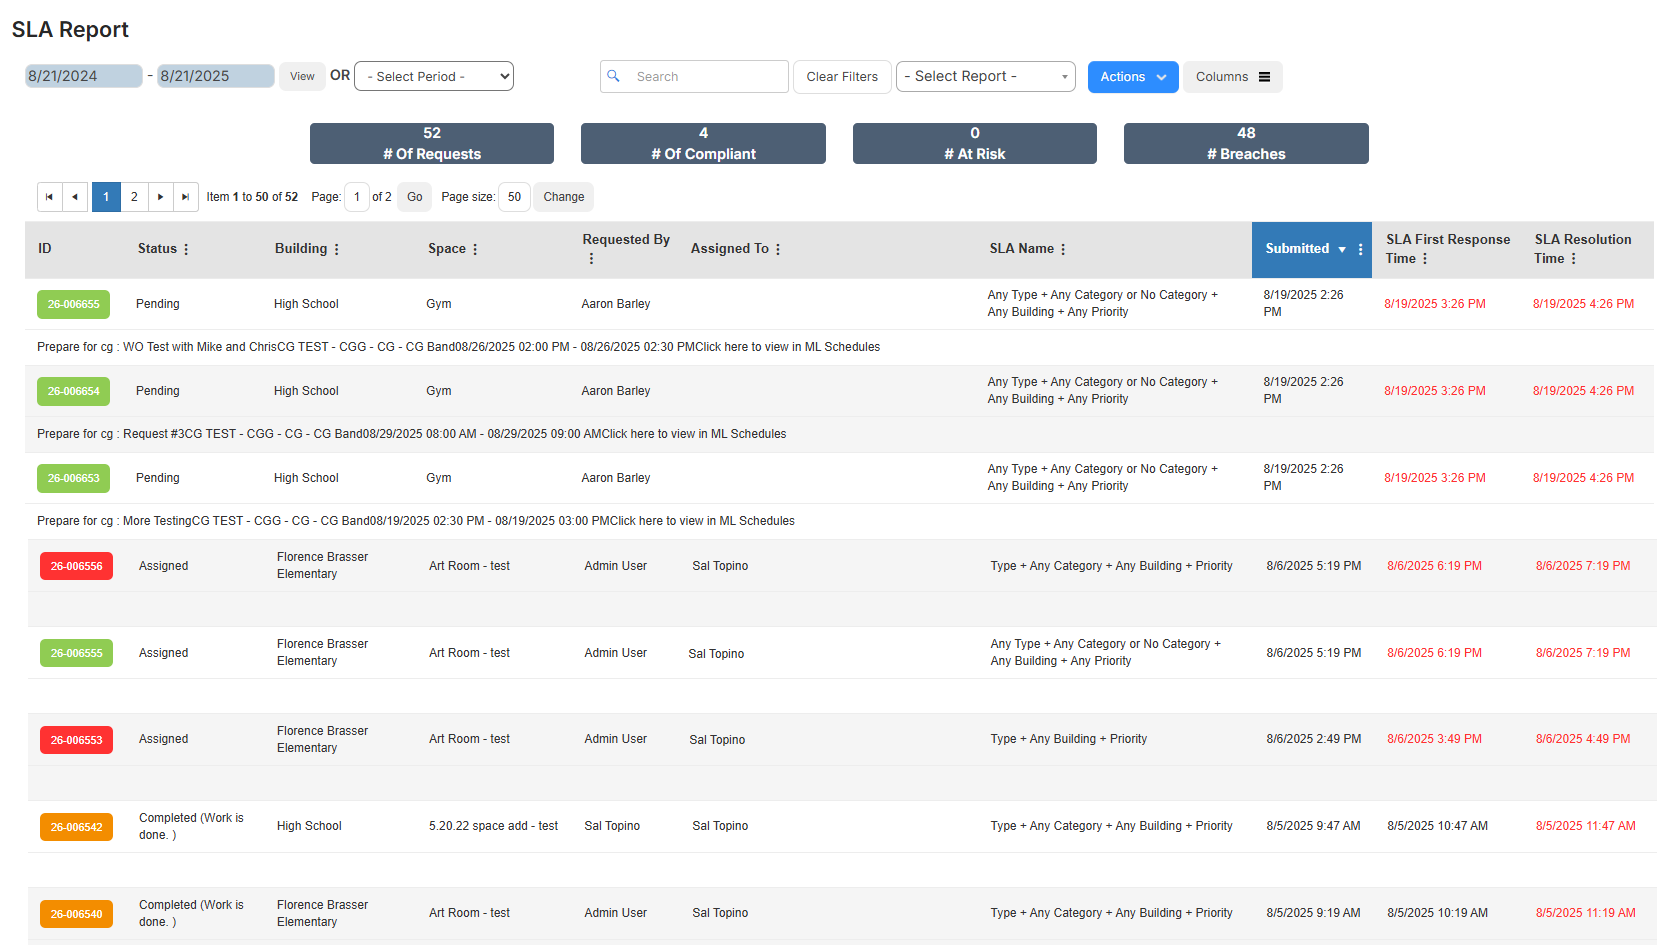
Destiny Help Desk users with the View Requests Reports permission can run a service level agreement (SLA) Report. This report shows requests that are linked to an SLA, as well as the number that are compliant, at risk, and have breached either the first response and/or resolution time.
You can customize your view of this page.
To view the SLA Report, select Reports > SLA Report. The report defaults to today's date.
To target the data you want, do any of the following:
| To... | Then... | |
|---|---|---|
| Modify the date range |
|
|
| Choose a preset time period | Use the Select Period drop-down to select the desired time period. | |
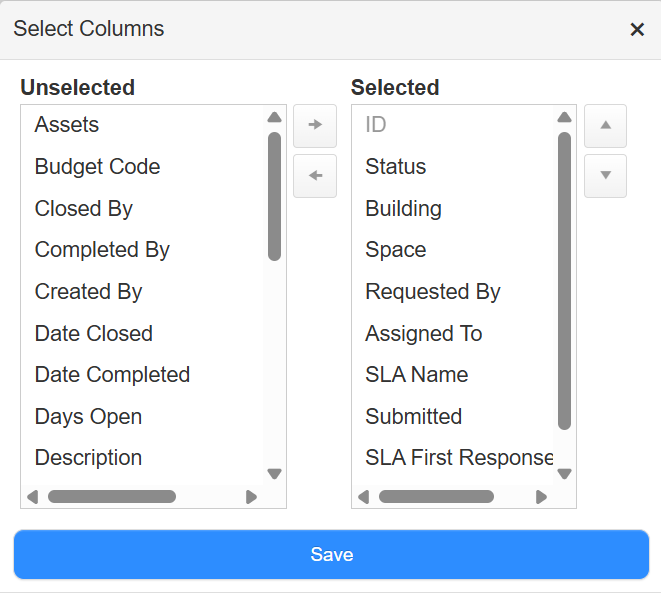
| Add or remove columns |
|
|
| Filter a column |
|
|
| Print the report | Select Actions > Print PDF. The report appears in your Downloads folder. | |
| Export an Excel file | Select Actions > Export to Excel. The report appears in your Downloads folder. |
 .
.