Manage vendors
In Help Desk, you can add vendors that you purchase your inventory items from. When users add or edit inventory, they can choose the vendor from a drop-down list.
Users with the Edit Inventory or Edit Asset user permission are able to manage vendors, as well as see vendor details.
The page also has features to customize your view.
To add a new vendor:
- Select Vendors.
- Select + Add Vendor. The Manage Vendor page appears.
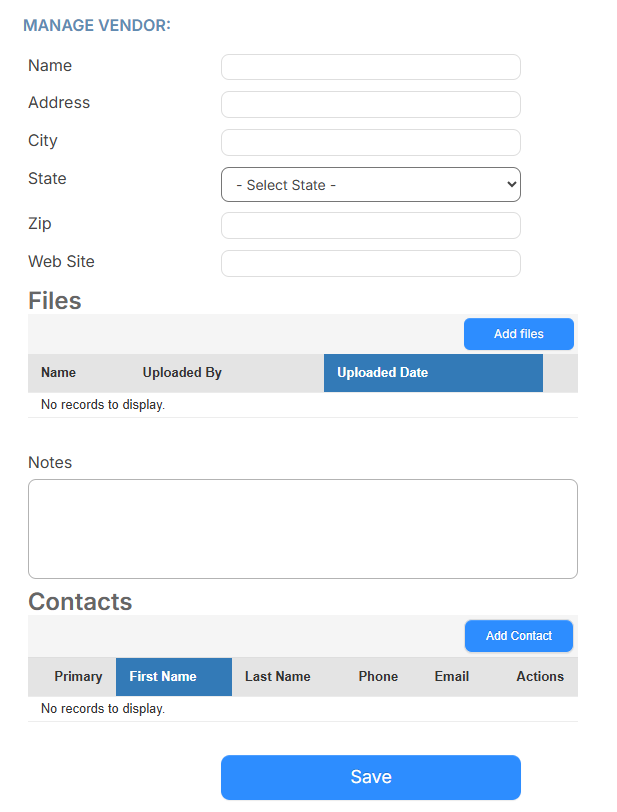
- Enter the following:
- Vendor's Name
- Vendor's address details
- Vendor's Web Site
- To upload files, click Add files. Find and select the files.
- Enter any Notes about the vendor.
- To add vendor contacts, do the following:
- Click Add Contact. The Add Contact pop-up appears.
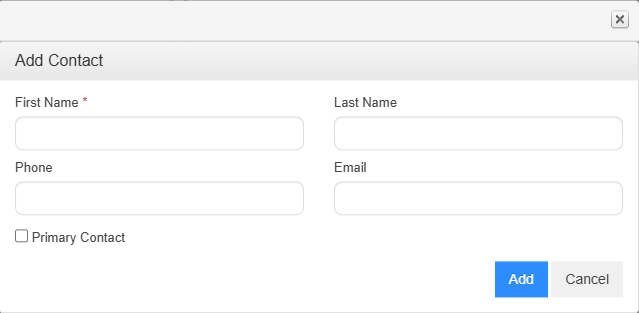
- Enter the contact's information.
- If this is the Primary Contact, select the checkbox.
- Click Add.
- To add another contact, click Add Contact.
- Click Add Contact. The Add Contact pop-up appears.
- Click Save.
You can also edit or delete a vendor.
To edit a vendor:
- Select Vendors.
- Next to the vendor to edit, click
 .
. - Make applicable updates.
- Click Save.
To delete a vendor:
- Select Vendors.
- Next to the vendor to delete, click
 .
. - On the pop-up, click OK.
To see the vendor details page:
- Select Vendors.
- Do one of the following:
- To launch the vendor's website or a map of their location, click the vendor name or address.
- To view the vendor details page, next to the vendor you want, click .