Manage preventative maintenance procedures
Help Desk users with the Manage PMs permission can add, edit, and delete preventative maintenance (PM) procedures. These procedures provide step-by-step instructions and are added to a preventive maintenance task during setup.
To add a new preventative maintenance procedure:
- Select PMs > Manage Procedures. The Procedures page appears.
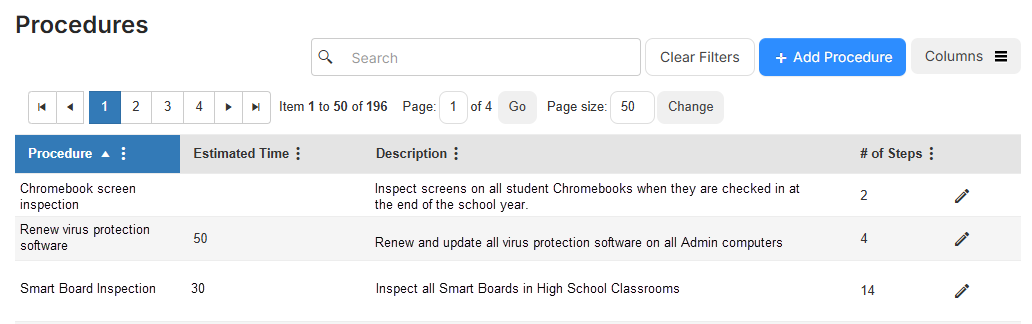
- Click + Add Procedure. The Manage Procedure page appears.
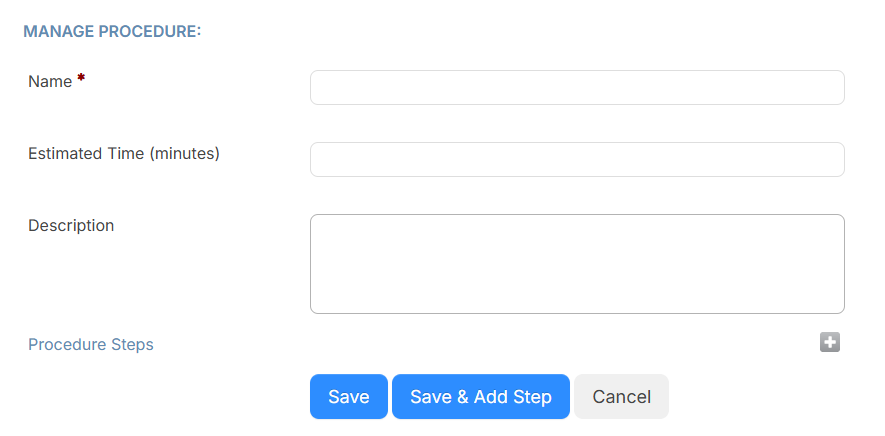
- Enter a Name, Estimated Time (minutes), and Description.
- To require technicians check that each step of a procedure is done, toggle Steps Required to show Required.
- In the Procedure Steps row, click
 . A new text box appears.
 - Enter a procedure step.
- To add additional steps:
- Click Save & Add Step.
- Enter the desired procedure step.
- Repeat until all desired steps are added.
- Click Save.
To edit an existing maintenance procedure:
- Select PMs > Manage Procedures. The Procedures page appears.
- Next to the procedure you want, click
 . The Manage Procedure page appears.
- Make the desired edits to the Name, Estimated Time (minutes), and Description fields.
- Under Procedure Steps, do any of the following:
If you want to... Then... Edit a step - Click
 . The step text box opens.
 - Make the desired edits.
- Click
 .
.
Delete a step - Click
 .
. - In the confirmation pop-up, click OK.
Add a step - Click Save & Add Step.
- Enter the desired procedure steps.
- Repeat until all desired steps are added.
- Click
To delete a preventative maintenance procedure:
- Select PMs > Manage Procedures. The Procedures page appears.
- Next to the procedure you want to delete, click
 .
. - On the confirmation pop-up, click Yes.
You can customize your view of this page.