Add, edit, view, or adjust inventory
You can manage the supplies used to fix requests as inventory in Help Desk.
The page also has features to customize your view.
Add inventory
Help Desk users with the Add Inventory permission can add inventory.
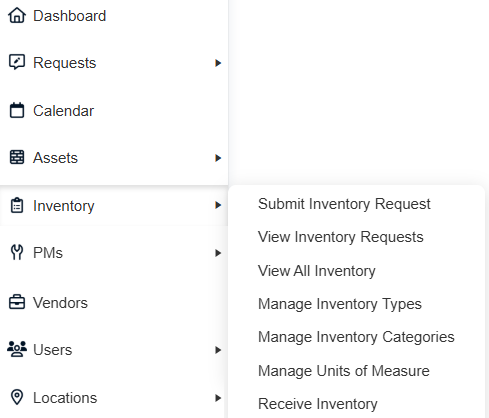
- Select Inventory > View All Inventory.
- Do one of the following:
- Select Actions > Add Inventory.
- Click
 , and then scan a barcode.
Note: If you scan a barcode, the Barcode field is pre-populated on the Manage Inventory page.
- Use the Inventory Type drop-down to select the related type.

- Enter the Inventory Name in the field.
- If you will link assets to inventory items and will charge for inventory, select the Can be Charged checkbox.
Note: Charges for inventory appear on the request details page, Charges tab.
- Complete the remaining fields.
- To add an image, click Choose File. Find the file, and then click Open.
- Enter a Description.
-
In the Stock section, do the following:
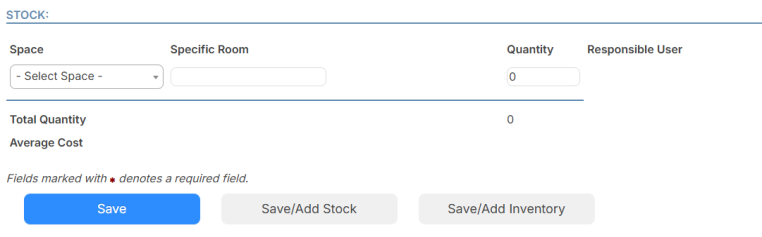
Field Description Space Use the drop-down to select the space.
Note: If the inventory item is Inactive, meaning the Active checkbox is not selected, you cannot add the space.
Specific Room
Enter the room where the inventory is located.
Quantity
Enter the current quantity.
Responsible User Use the drop-down to select the user responsible for the items.
Note: This user will receive an email notification that the inventory item is low when stock hits the number entered in the Minimum Quantity field.
Note: To add stock in another space, click Save/Add Stock, and then complete the fields in the Stock section.
- Do one of the following:
- Click Save.
- To add more inventory, click Save/Add Inventory.
To view inventory item details:
- Select Inventory > View All Inventory.
- Click the inventory item you want. The item details page appears.
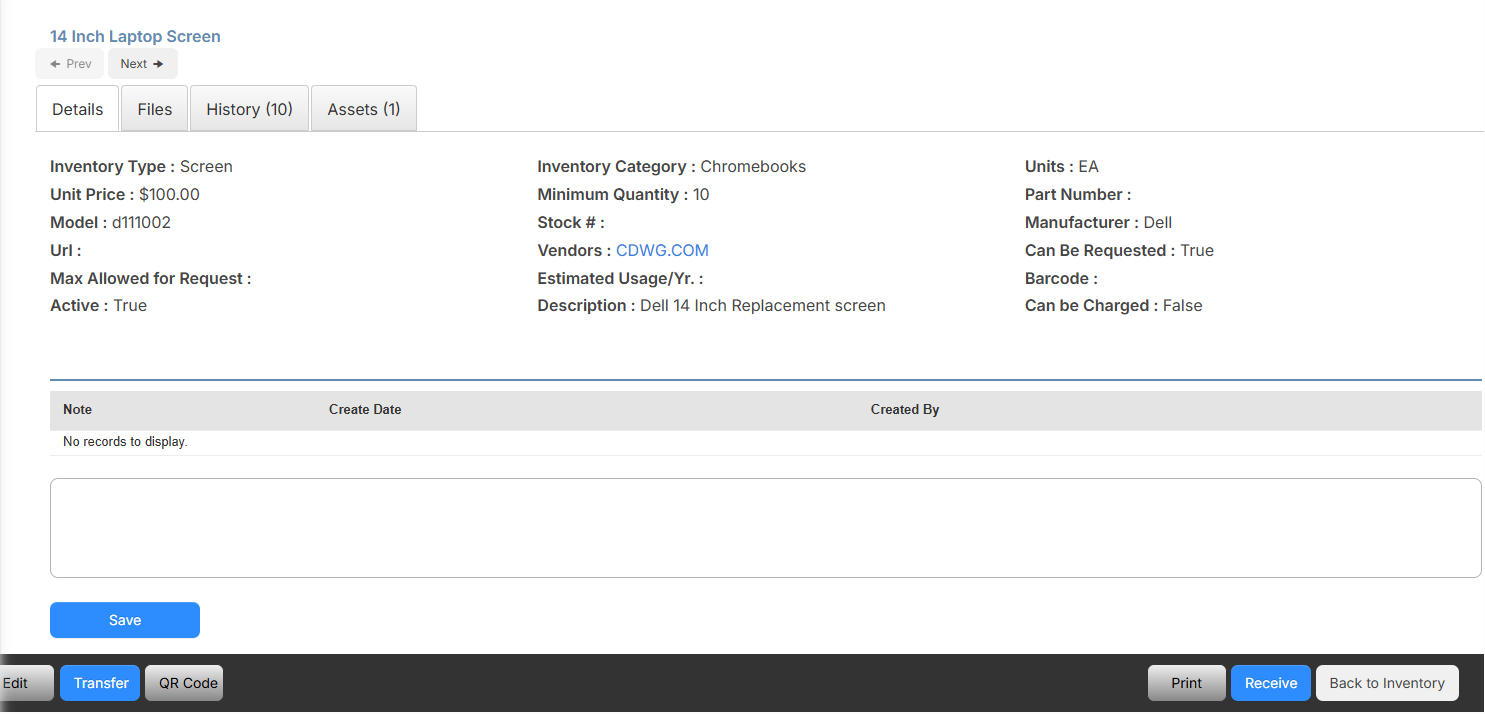
Note: In the top-left, click Prev or Next to move from asset to asset without returning to the View All Inventory page.
Edit inventory
Help Desk users with the Edit Inventory permission can edit and inactivate inventory, including enabling or disabling inventory requests. In addition, users can adjust inventory amounts.
- Select Inventory > View All Inventory.
- In the row of an inventory item, click
 .
. - Do any of the following:
- Update any of the fields.
- To inactive stock, scroll to the Stock section, and in the row of the stock, click
 .
. - If inventory can be requested, ensure the Can Be Requested checkbox is selected. Otherwise, to disable inventory from being requested, ensure the checkbox is deselected.
- Do one of the following:
- Click Save.
- To add stock in another space, click Save/Add Stock.
- To add more inventory, click Save/Add Inventory.
- Select Inventory > View All Inventory.
- In the row of the inventory item you want to adjust, click
 . The Adjust Quantity pop-up appears.
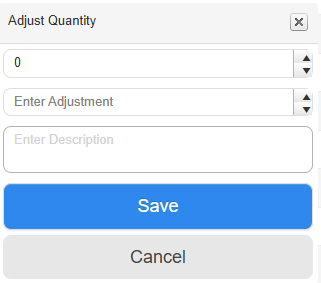
- Enter the adjustment amount.
- Enter a reason the amount is being adjusted.
- Click Save.