Manage custom field lists and sections
Destiny Help Desk users with the Manage Site Settings administrative permission can manage custom field lists and sections. You can also apply custom fields to asset types.
You can customize your view of this page.
To manage the custom field list:
- Select Settings > Custom Fields > Setup. The Manage Custom Fields page appears.
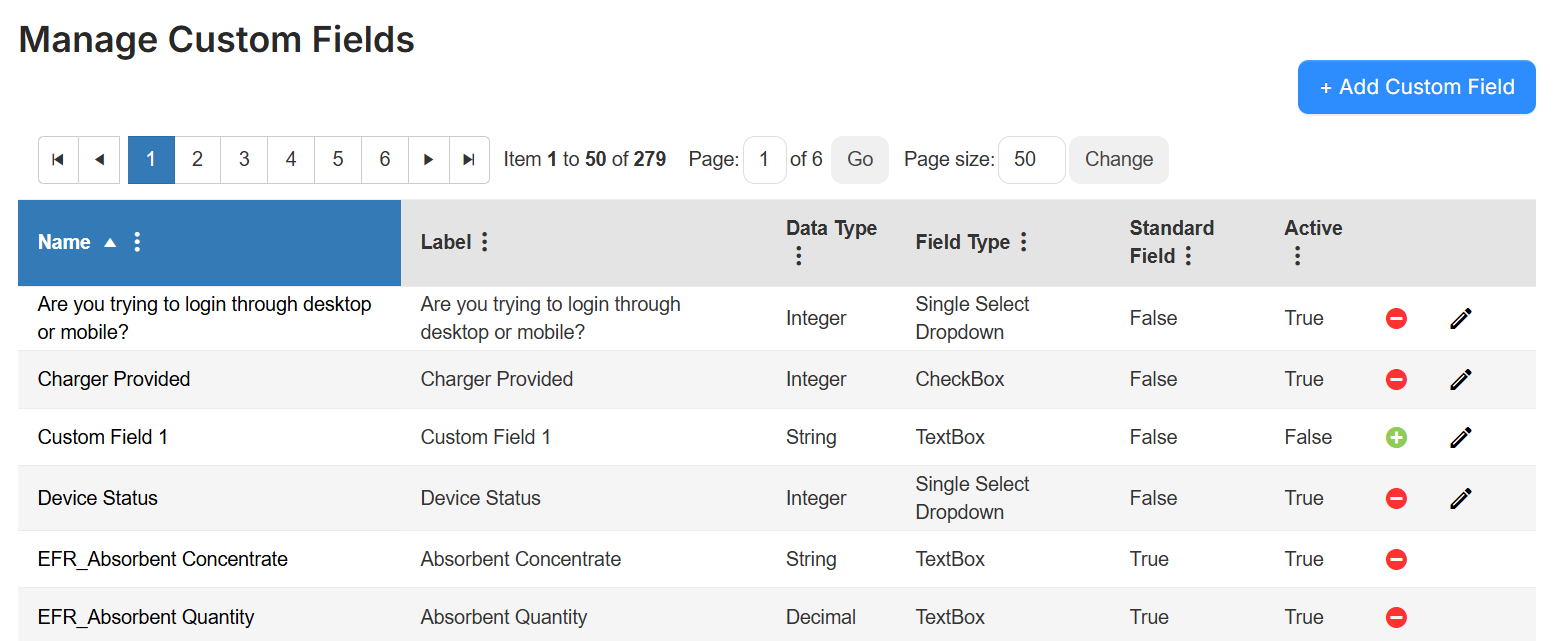
- If you want to manage an existing custom field, next to the field you want, do any of the following:
To... Then... Inactivate Click  .
.Activate Click  .
.Edit - Click
 .
. - Make any desired changes.
- Click Save.
- Click
- If you want to add a custom field:
- In the top-right corner, click + Add Custom Field. The Manage Field page appears.
- Enter the following information in the correct fields:
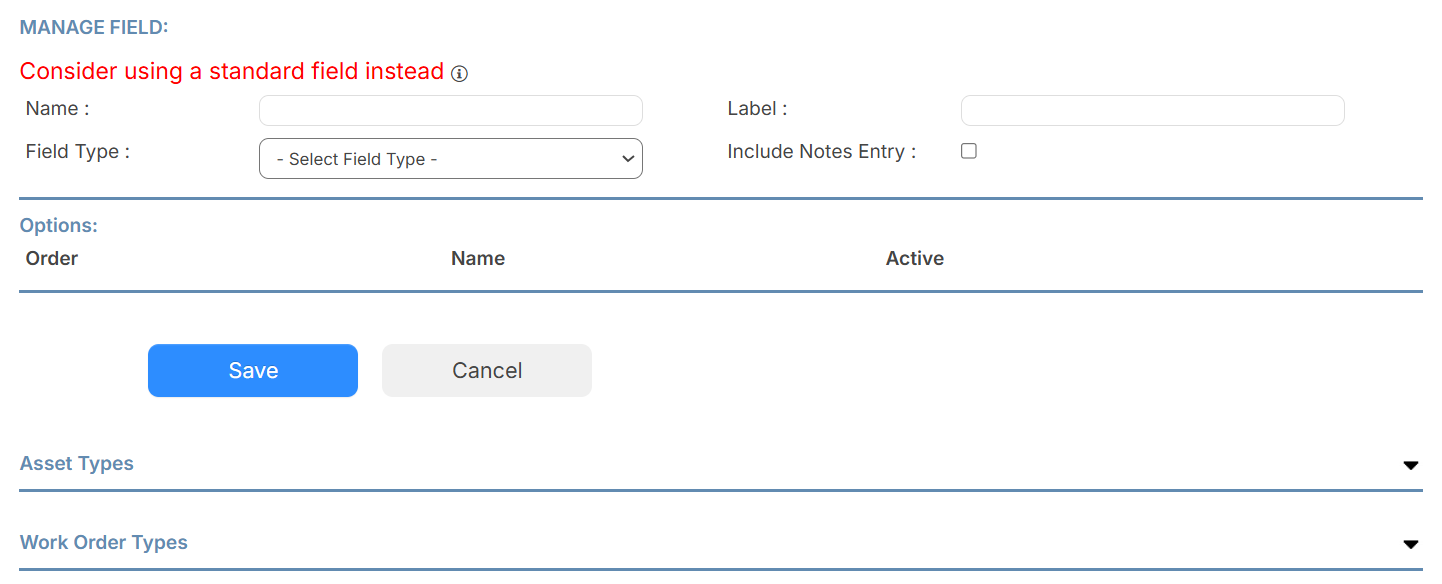
Field Description Name Enter a field name. Label Enter a label for the field.
Note: This can be used to help a requestor submit a request, such as providing a more recognizable name or a question.
Field Type Use the drop-down to select the type of field you want. Available fields types are:
- CheckBox
- Multi Select Dropdown
- RadioButton
- Single Select Dropdown
- Single Select Search
- TextBox
- TextBox with Formatting
Include Notes Entry To include a note field, select the checkbox.
Note: This checkbox is not available if TextBox was selected at Field Type.
Data Type (if applicable) If TextBox was the selected Field Type, choose Data Type from the drop-down. Options (if applicable) All Field Types (excluding the TextBox type) will require you to enter the options shown when a request is created.
Note: This section is not available if TextBox was selected at Field Type.
- Click Save. The Options section now includes data.
- Use the Options section to add selections, and update the order of the selections for your newly created field.
Note: This section is not available if TextBox was selected at Field Type.
You can now apply the custom field to an asset type(s).
- Select Settings > Custom Fields > Setup. The Manage Custom Fields page appears.
- Next to the field you want to apply an asset type to, click
 .
. - Under the Options section, click Add Asset Types. A pop-up appears.
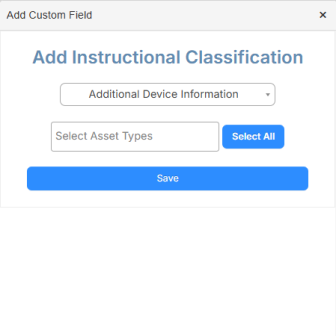
- From the drop-down, select the field section.
Note: For Instructional Classification and Funding Source, you can only choose custom field sections. To add to an EFR section, you have to edit the asset type.
EFR sections are:
- General Information
- Financial
- IT Related
- Specifications
- Click in the Select Asset Types field to select asset type(s), or click Select All.
- Click Save.
To manage custom field sections:
- Select Settings > Custom Fields > Custom Field Sections. The Field Sections page appears.
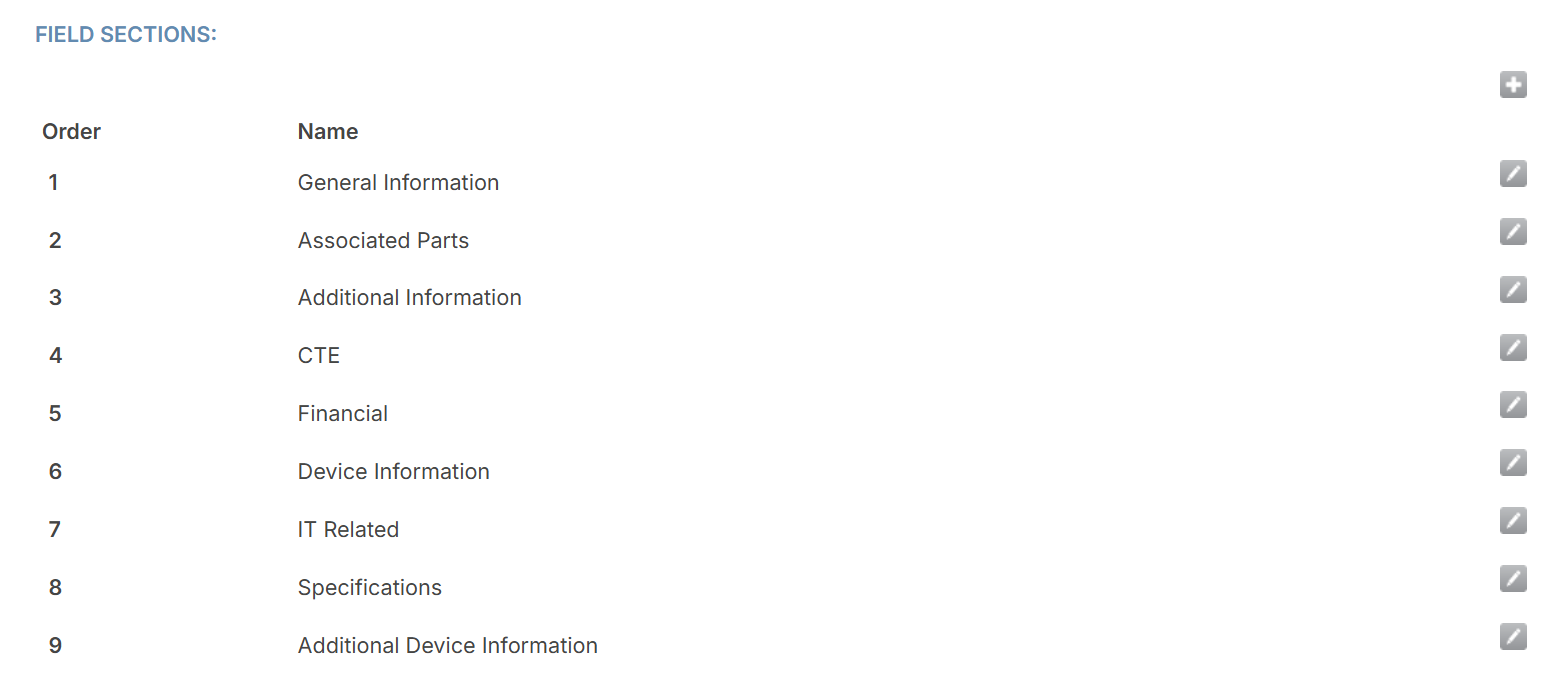
- Do any of the following:
If you want to... Then... Reorder the sections Drag and drop the sections into the desired order. Edit an existing section - Next to the section you want, click
 .
. - Make the desired edits.
- Click Save.
Add a new section - On the top-right side, click
 .
. - Enter a name.
- Click Save.
- Next to the section you want, click