Manage Destiny SSO Groups
Before Destiny users can access Help Desk, they need to be set up in Help Desk as a single sign-on (SSO) group. Each Destiny access level and user type is mapped to a corresponding Help Desk role. You can set up one group at a time, or bulk add groups.
|
Note: Before you can bulk add SSO groups, you need to add Destiny sites to existing buildings. |
To give one Destiny group access to Help Desk:
- Select Settings > Single Sign On > Destiny Settings. The Manage Destiny SSO Groups page appears.
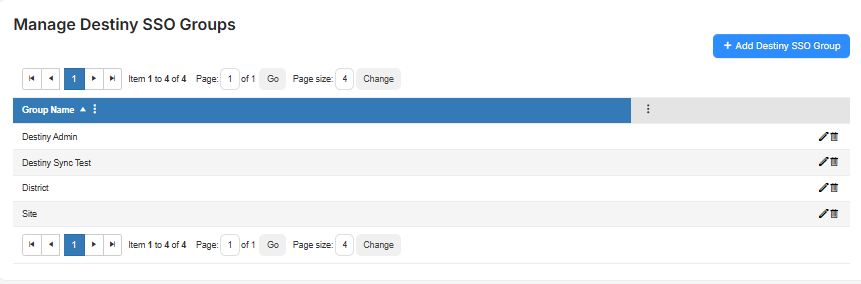
- Click + Add Destiny SSO Group. A pop-up appears.
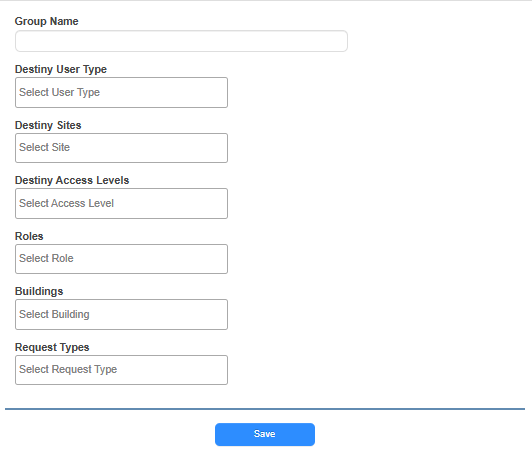
- Do the following:
- Enter a unique Group Name.
The following fields are multi-select drop-downs. This means you can make as many selections as you want from each.
- Destiny User Type
- Destiny Sites
- Destiny Access Levels
- Roles (as set up in Help Desk)
- Buildings (as set up in Help Desk)
- Request Types
- Click Save.
- To sync updated data right away, do one of the following:
- To sync a group, click
 .
. - To sync all groups, click Manually Sync.
- To sync a group, click
To edit a Destiny group:
- Select Settings > Single Sign On > Destiny Settings. The Manage Destiny SSO Groups page appears.
- Click
 .
. - Update any fields.
- Click Save.
To delete a Destiny group:
- Select Settings > Single Sign On > Destiny Settings. The Manage Destiny SSO Groups page appears.
- Click
 .
. - On the Delete Group pop-up, click Yes.
- Select Settings > Single Sign On > Destiny Settings. The Manage Destiny SSO Groups page appears.
- Click + Bulk Add. The Bulk Add Destiny SSO Groups page appears.
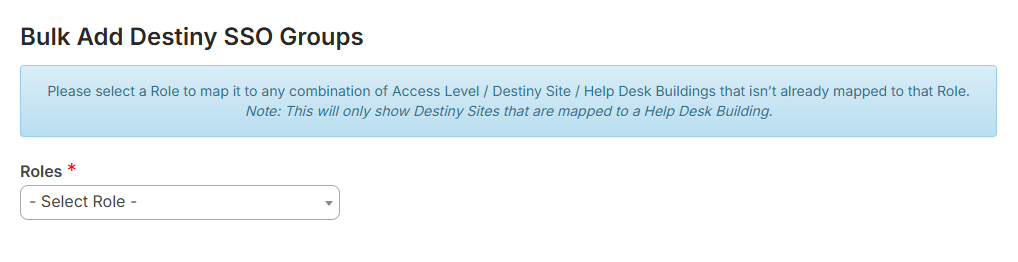
- Use the Roles drop-down to select the Help Desk role you want to map to.
- On the list that appears, select the checkbox next to each Destiny access level that will have the selected role.
Note: You can customize the view to narrow the list of results.
- Click Save. A message states that the selected access levels were successfully added.