Manage requests assigned to you
When you are assigned to work on a request, you will receive an email notification. You can enter notes, labor hours, inventory, and purchase transactions directly on the request. Then, mark the request complete.
|
Note: For more information on assigned requests in Help Desk, watch this video. |
To manage requests assigned to you:
- Access the desired request by doing one of the following:
- On the bottom of the email notification, click the link.
- When logged in to Help Desk, select Requests > My Open Assignments.
- To see the request details, next to the request you want, click the Request ID number.
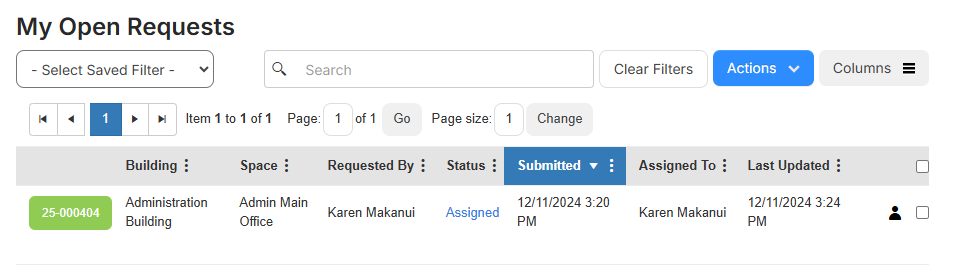
Note: Requests are color-coded based on priority. Red is urgent, orange is high, yellow is medium, and green is low. The request details page appears.
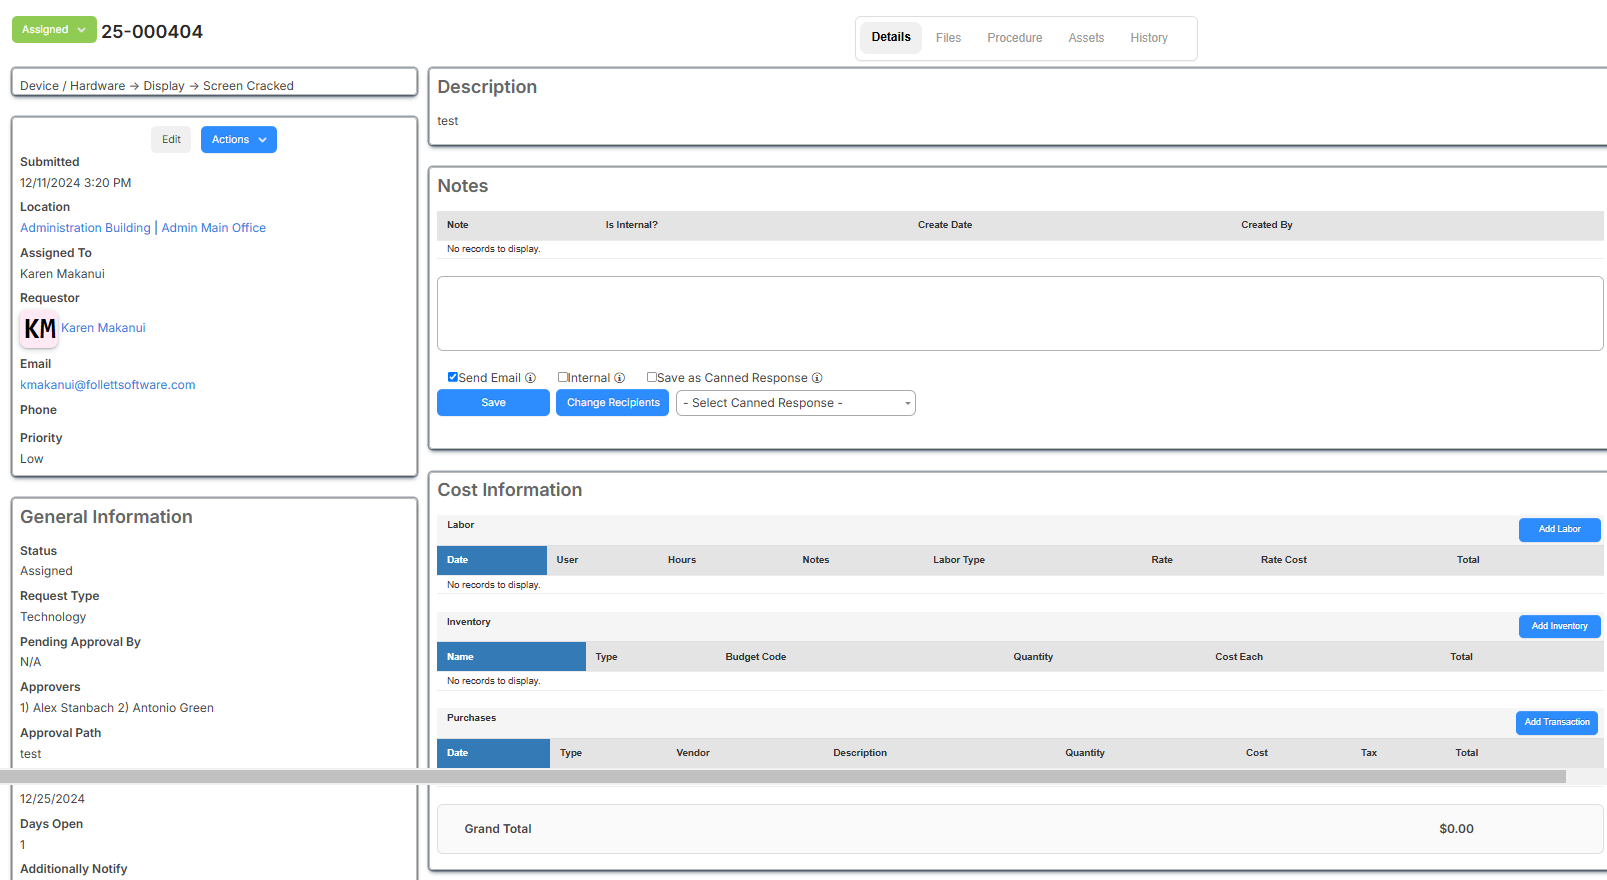
Note: If a request is at risk or has breached a service level agreement (SLA) first response or resolution time, an SLA section will appear above the Description section. - When you start work on the request, click the Status button and select In Progress.
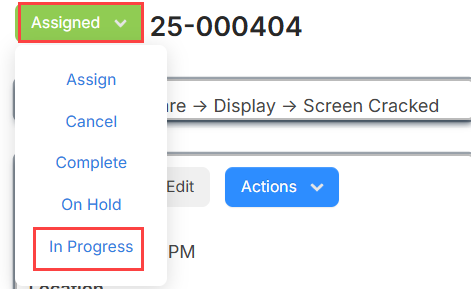
An email notification is sent alerting the requestor that work has started on this request.
- Do any of the following:
If you want to... Then... Add a note - Under Notes, do any of the following:
- In the text box, enter the desired note.
- From the Canned Response drop-down, select the desired response.
- Select any of the following checkboxes:
- Send Email: Determines if this note should also be emailed.
- Internal: Limits the note to users assigned to this request, users who can assign it to others, and any additional users selected when you click Change Recipients.
- Save as Canned Response: The canned response will get an auto-name that includes the request's purpose and problem type, if applicable.
Note: You can edit the name on the Canned Responses page.
- If you are also changing the status of the request, save the request instead of the note to avoid two emails being sent. Otherwise, if only adding a note to the request, click Save.
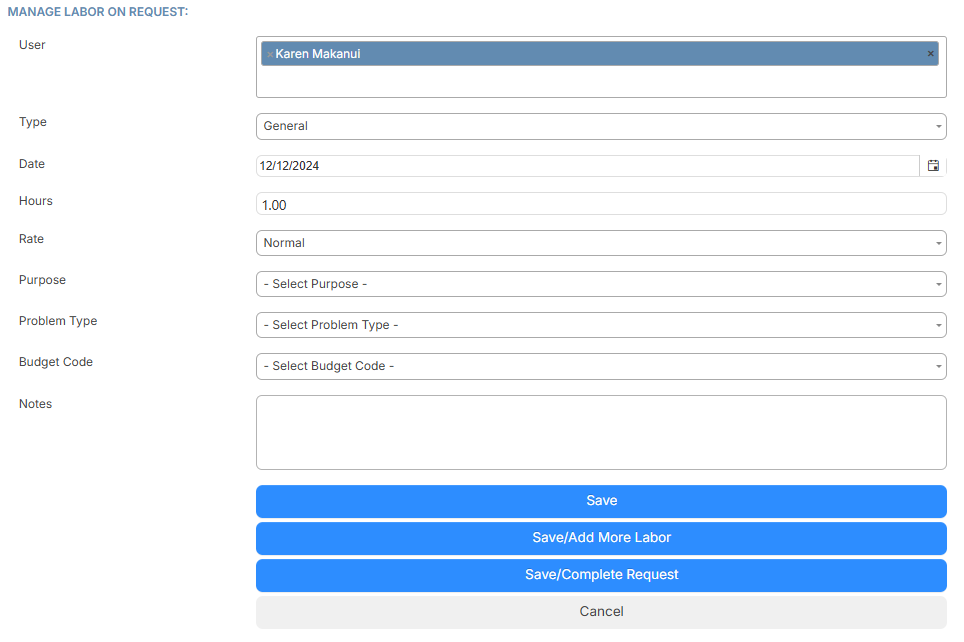
Enter labor hours - Under Cost Information, click Add Labor. The Manage Labor on Request page appears.
- Do any of the following:
- To add an additional User, click in the field and select the user.
- Select the Type from the drop-down.
- The Date is auto-filled with the current date. To change it, click the calendar icon and select the desired date.
- Enter the number of labor Hours worked.
- Select the labor Rate (Normal, Time and a Half, or Double Time) from the drop-down.
- Select the Purpose, Problem Type, and Budget Code from the drop-down.
- In the text box, add any notes.
- Do any of the following:
- To save and add more labor later, click Save.
- To add more labor, click Save/Add More Labor.
- When you are finished adding all labor, click Save/Complete Request.
Notes:
- Labor costs are only visible to users with the View Labor Reports permission.
- You can add labor for multiple users in one entry.
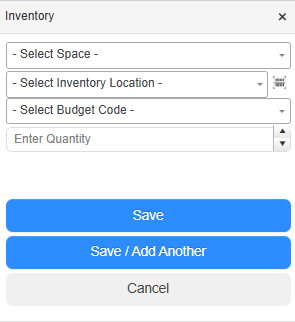
Example: You select two users and enter 2 labor hours. This results in one labor entry for each user of 2 hours, four hours total. Enter inventory - Under Cost Information, in the Inventory section, click Quick Add. The Inventory pop-up appears.
- Do any of the following:
- Select the Space from the drop-down.
- Select the Inventory Location by:
- Using the drop-down.
- Clicking the barcode icon to scan the item.
- Select the Budget Code from the drop-down.
- Enter the quantity.
- Click Save or to continue adding inventory items, click Save/Add Another.
Enter a purchase Note: Purchases can include materials, rentals, and contract services. - Under Cost Information, click Add Transaction. The New Transaction page appears.
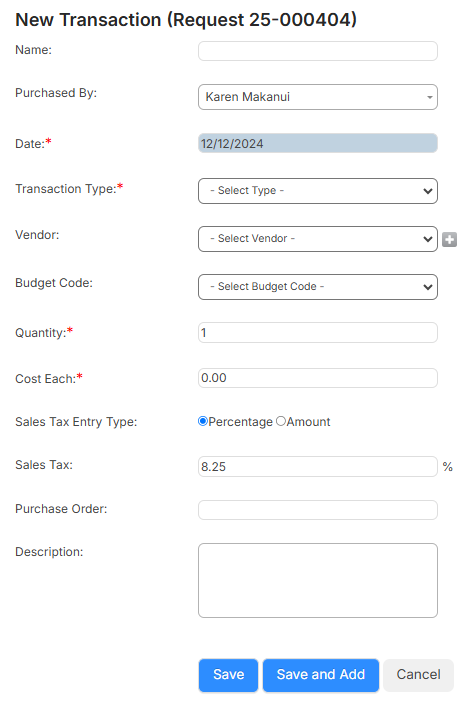
- Fill out the required fields and any other applicable fields.
- Do any of the following:
- To add additional purchases, click Save and Add.
- When all purchases are added, click Save.
Upload files - On the Files tab, click Add Files.
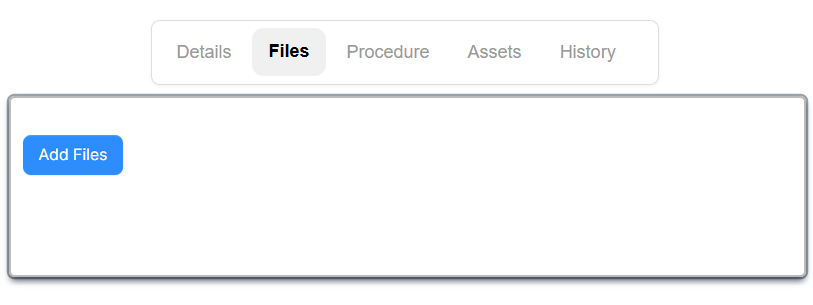
- Select the file(s) you want.
- Click Open.
To delete a file, click
 .
. - Under Notes, do any of the following:
- When work is complete, and all notes, files, and labor hours have been tracked, change the status to Complete.
Notes:
- If technicians are required to check that each step of a procedure is done, and they do not mark all steps, they cannot mark the request complete.
- A request can be Closed (if no work is needed) or Completed (if work is done) at the Pending status if you have the Close Request permission.