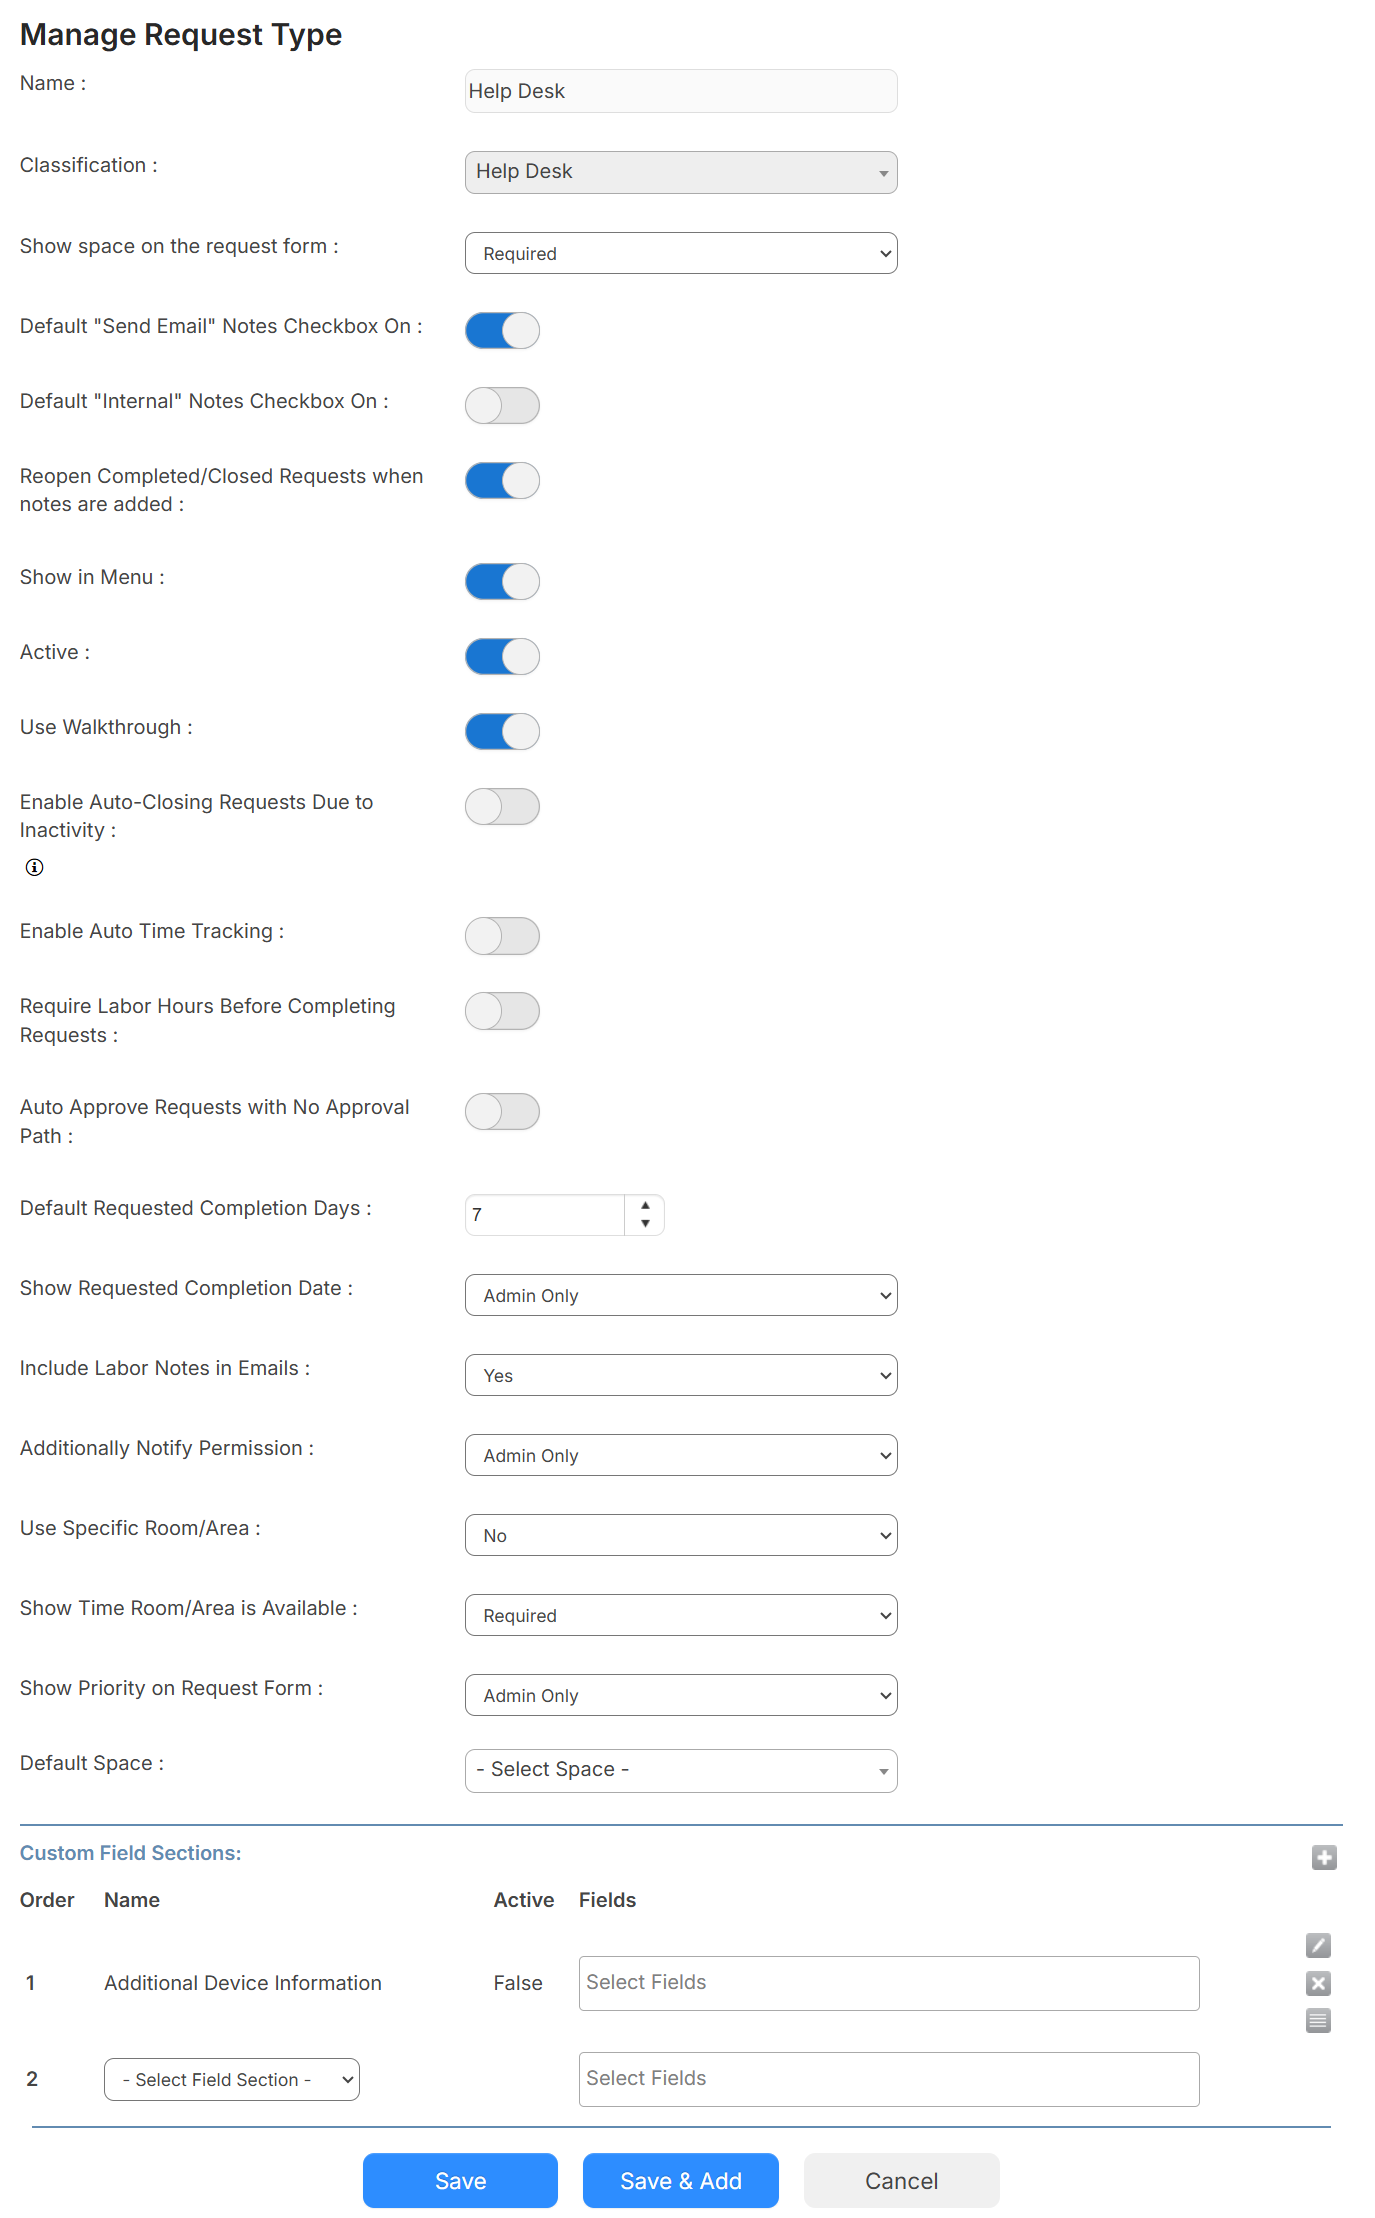
| Show space on the request form toggle | Enables the Space field on the request form. |
Default "Send Email" Notes Checkbox On toggle | Enables users to send an email when creating a note in the request. |
Default "Internal" Notes Checkbox On toggle | Enables users to record internal notes. |
| Reopen Completed/Closed Requests when notes are addedtoggle | Enables a completed or closed request to be reopened when a note is added. |
| Show in Menu toggle | Enables this request type to appear in the New Request and Menu drop-downs. Toggle off to make this request type only accessible via a custom form. |
Active toggle | Enables user to choose this request type. Toggle off to disable this request type. |
Use Walkthrough toggle | Allows for a step-by-step request form submission process. Toggle off to use a form view. |
| Enable Auto-Closing Requests Due to Inactivity toggle | Enables requests to auto-close when there is no activity for a specified period of time. | Note: When requests are auto-closed, an external note is added, stating, "This request has been automatically closed due to inactivity". |

- To set how long a request will remain open with no activity, next to # Days to Auto-Close, select the desired number of days.
| Note: Activity can include status changes; notes, labor, and purchases added; and any field value change. |
- To send an email when requests are automatically closed, select the checkbox.
|
| Enable Auto Time Tracking toggle | Select Yes to automatically enter the hours on the request, from when a user changes the status from In Progress to when they change it to Completed. |
| Require Labor Hours Before Completing Requests toggle | Select Yes to require that labor hours be entered on each request before the request can be completed. |
| Auto Approve Requests with No Approval Path toggle | Select Yes to automatically approve any requests without an approval path. |
| Default Request Completion Days | To automatically add a 'complete by' date to requests if a requested completion date is not entered, enter the number of days this request should take to complete after it is submitted. |
| Show Requested Completion Date drop-down | Allows users to enter a requested completion date. You can select: - Admin Only
- All Users
- No: Hides the completion date for all users.
- Required: All users must enter a requested completion date.
|
| Include Labor Notes in Emails drop-down | To send email notifications when labor notes are added, select who will receive email notifications: - Yes for all users
- Internal Only for Admin users
- No for no users
|
| Additionally Notify Permission drop-down | Select who can add additionally-notified users to a request: - Hide Field
- Admin Only
- All Users
|
| Use Specific Room/Area drop-down | Select Yes if you would like a room/area to be required on a request. |
| Show Time Room/Area is Available drop-down | To have users submitting a request enter a time when a room or area is available, select any of the following: - Not Required: Optional
- Required
- No: Hide this field from the form.
|
| Show Priority on Request Form drop-down | Allows users to see the Priority filter on the Request form. You can select: - Admin Only
- Admin and Assignees Only
- All Users
|
| Show Asset on Request Form drop-down | Allows users to see the Asset filter on the Request form. You can select: - Show All Users (Override Permissions)
- Only Show to Users with Permission
|
Default Space drop-down | Note: Only applies to email-submitted requests and custom form submissions. There is no impact on regular request submissions. |
| For emailed requests: If the user does not have a default space in their profile, this default space is used. For custom forms: If a space is not a field on the custom form, this default space is assigned. |
| Change Closed Requests Color to Grey | Turn this toggle on to have completed statuses (including Canceled, Closed, Completed, Declined, and Duplicate) appear in grey font on requests and request reports. |
 .
.
 .
. .
.