Add inventory items and charges on the request details page
When viewing a request detail, you can quick add inventory and add charges for inventory.
Users can include inventory in a request that was used to complete it.
Users with the Approve Requests, Approve on Behalf of Others, or Can Be Assigned Requests permissions can quick add inventory or inventory charges to a request.
To quick add inventory items:
- Select Requests > View All Requests.
-
Find a request by searching or using a filter(s).
- Click a Request ID. The request details page appears.
- In the Cost Information section, click Quick Add. The Inventory pop-up appears.
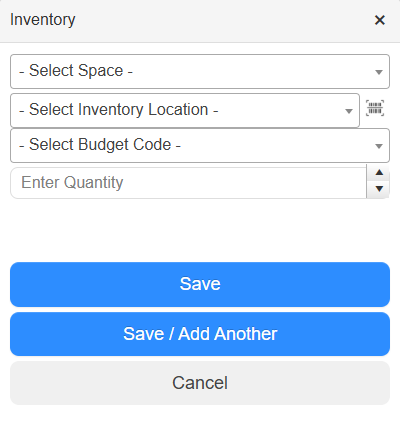
- Do the following:
- From the Select Space drop-down, select the space of the inventory item.
- From the Select Inventory Location drop-down, select the inventory item.
Note: Only inventory from the selected space appears.
- Select the budget code.
- Enter the quantity of items being used.
- Choose one of the following:
- To save and return to the request details page, click Save.
- To save the items and add more inventory, click Save / Add Another.
- To return to the request details page without saving, click Cancel.
To add inventory charges:
- Select Requests > View All Requests.
- Click a Request ID. The request details page appears.
- In the Cost Information section, click Add Inventory. The New Inventory page appears.
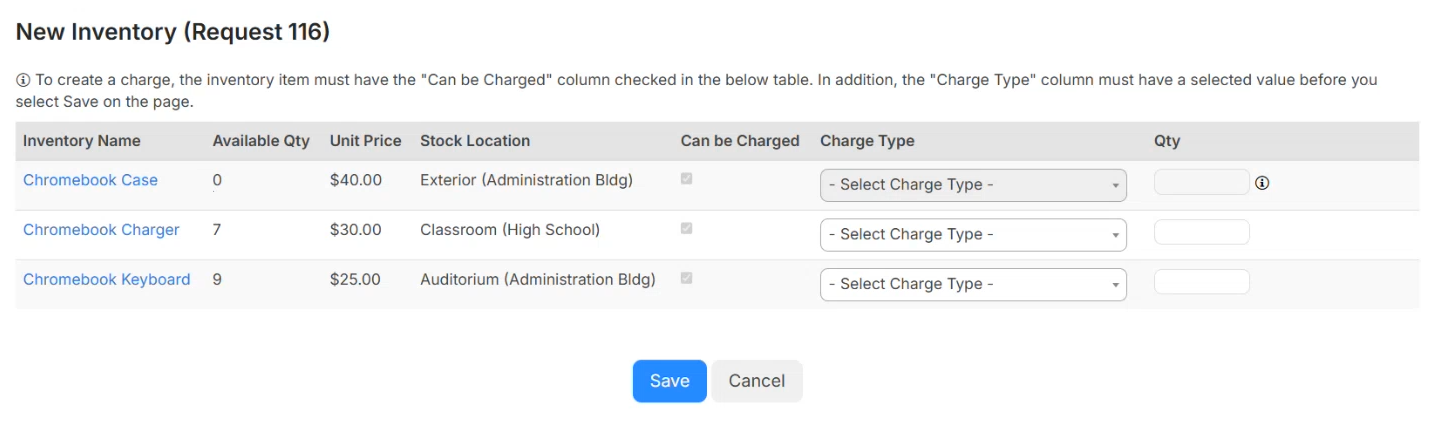
- Next to the inventory item you want to create charges for, select the Charge Type from the drop-down.
Note: You can only add charges for items if the Can be Charged column has the checkbox selected, and the Available Qty is one or more.
- Enter the Qty.
- Click Save.